Summer Food – Kūmara
Te Puna
Atua: Pani Tinaku.
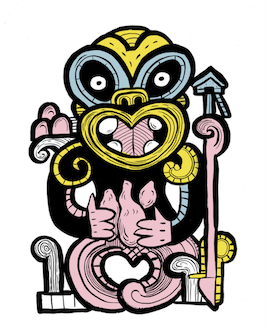
Whakapapa
The whakapapa of Pani Tinaku.
Pani Tinaku - Whakapapa (PDF, 36 KB)
Pūrākau
A Tūmatauenga rāua ko Rongomaraeroa (PDF, 38 KB)
Waiata
Pōpō! http://hana.co.nz/online/ko-wai/
Karakia
Maie te Tupua
A karakia from Waikato for lifting kūmara crops.
"Maie te tupua, maie te taniwha
I haere mai koe i whea?
I a Whakaotinuku, i a Whakaotirangi
Ko tō manawa, ko taku manawa
E Tāne ka irihia
Whano, whano, haramai te toki
Haumi e!
Hui e!
Taiki e!"
Whakataukī
Kāore te kūmara e kōrero mō tōna māngaro.
He Atua! He Kōrero!
Te Hanga Atua Kiato
Design and make an atua kiato from pumice (or kōrari). Talk to students about safety when working with sharp tools. Pumice dust is not good for lungs, so make sure students wear masks that cover their mouth and nose.
What you need
- He Kōrero mō te Kūmara (item number 11023 – order from Down the Back of the Chair)
- Long pieces of pumice or kōrari
- Small sharp knives, chisels, nails (for carving)
- Pencils
- Face masks
- Sandpaper
What you do
- Explain to your students:
Ko te atua kiato he rākau o mua. Ko Pani rāua ko Rongo ngā atua o te kūmara, ā, ka whakaahuangia rāua mō te māra. He mana nui ō rāua, koinā i whakairohia ai a Pani, a Rongo rānei (hoki rānei?) hei atua kiato. Ka takina te atua kiato ki ngā kokonga o te māra kūmara hei manaaki i te māra me ōna hua katoa.
- Read the book He Kōrero mō te Kūmara with your students. Discuss the atua associated with the gardens and cultivated food.
-
As a class look at images of ‘atua kiato’. This link to Te Ara shows an atua kiato.
http://www.teara.govt.nz/en/object/17373/atua-kiato - Enlarge these images as a guide for students.
- Each student needs paper and a pencil, a carving implement and a piece of pumice.
- Students draw designs onto paper first. Get them to look at the proportions, and the shape of their pumice. Draw the outline onto the pumice.
- Cut away the pumice to give a rough shape of the atua kiato.
- Shape the body. Students will need to work carefully as pumice can break if they are working with thinner pieces.
- Work the pumice at the top of the atua kiato, shaping the head, ears, eyes, nose, mouth.
- Use sandpaper to smooth the surfaces of your atua kiato. Decorate with paint (optional).
A Tūmatauenga rāua ko Rongomaraeroa
What you need
- Copies of the story
What you do
-
Print the story A Tūmataenga rāua ko Rongomaraeroa. Organise the students into three groups. Students read the story, taking turns to read aloud.
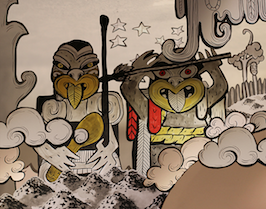
- As a class discuss the story. Explain that each group will work with a section of the story to devise a play.
Act 1: paragraph 1 and 2
Act 2: paragraph 3
Act 3: paragraph 4
- Students will work together as a group to:
– Write a script
– Choose actors
– Make costumes and props
– Consider music, lighting and staging
– Practise and perform their act.
– Groups then work together to stage the whole play – do any adjustments need to be made? What works? What doesn’t?
– Stage the whole play for tēina or whānau.
- Depending on how familiar your students are in writing plays, you could use the play writing process in the He Manu Tuhituhi:
– He Tuhinga Whakangahau, pages 33–57
– and He Kura Tuhituhi me He Manu Taketake, pages 159–183.
Download He Manu Tuhituhi PDFs:
He Tuhinga Whakangahau (PDF, 27 MB)
He Kura Tuhituhi me He Manu Taketake (PDF, 5 MB)
Pōpō
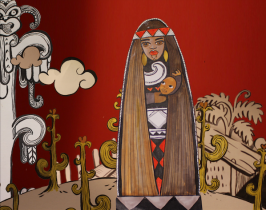
A complete teacher’s resource on classic tribal waiata – Ko Wai – exists and includes Enoka Te Pakaru’s iconic Pōpō! This resource also has an oral language focus targeted at levels 1–4. Explore this with your students.
Pōpō is also found at the end of the book He Kōrero mō te Kūmara (item number 11023).
http://hana.co.nz/online/ko-wai/
Maie te Tupua
Ako ā-Kākā
- Rote learn the karakia, Maie te Tupua, and use as class karakia at appropriate times.
Composing a Karakia
He Kōrero mō te Kūmara (PDF, 12 MB)
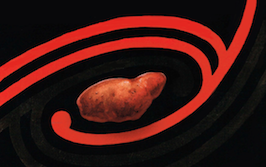
Compose a karakia that acknowledges Rongo, Pani and the kūmara.
What you need
- He Kōrero mō te Kūmara (item number 11023)
- A3 paper
- Felt pens
- Dictionary
What you do
- Read the book He Kōrero mō te Kūmara – as a class, in small groups or individually. Discuss the different stories about the arrival of the kūmara to Aotearoa.
- Discuss ‘karakia’ as a class. Karakia are type of reo mihi. What is their purpose?
– He aha te pūtake o te mihi?
– Mā wai te tuhinga?
– He aha tētahi tapanga mō te tuhinga?
– Kei te whakamihi ki a wai?
– He aha ngā āhuatanga hei whakamihi?
- Depending on how familiar your students are with writing tuhinga mihi, you could use the sections in the book from the He Manu Tuhituhi resource, He Tuhinga Mihi, (pages 10–22), to facilitate writing.
- Students refer to other examples of karakia that they know and decide what the purpose of each karakia is.
- In their groups, students compose a karakia acknowledging Rongo, Pani and the kūmara. Refer to:
– A Tūmatauenga rāua ko Rongomaraeroa
– He Kōrero mō te Kūmara
– Pōpō
– Te Ara
- Groups present their karakia to the wider class.
Kāore te kūmara e kōrero mō tōna māngaro
This whakataukī is widely known and often used. It reminds people to be modest and let others sing your praises, rather than boast about them yourself.
Kūmara in a Flash
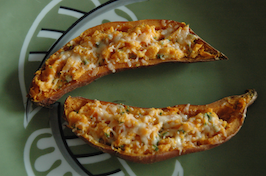
This is a really easy recipe! It is healthy and quick to make. Try out different fillings – both sweet and savoury.
What you need
- Kūmara
- Baked beans
- Sour cream
- Avocado
- Grated cheese
- Tomato (chopped)
- Parsley or other herbs (chopped)
What you do
- Wash the kūmara.
- Cook the kūmara in the microwave for 3–4 minutes.
- While the kūmara is cooking prepare the toppings.
- Carefully slice the kūmara in two.
- Fill the kūmara with your chosen topping.
- Alternatively, you could scrape and mash the flesh of the kūmara with butter, and put it back in its skin. Season with salt and pepper.
- Savour the flavour!
Sweet Thing … Kūmara
Kūmara Bread
This recipe is in the student’s book Te Kūmara – Kātahi nā te kai reka! (item number 11024).
The recipe has two stages – first boil the kūmara until cooked, then use the cooked kūmara to make a bread.
This bread is delicious while it is still hot. If you don’t eat it all when it is fresh from the oven, it is really good toasted.
Students work in pairs to make parāoa kūmara.
Parāoa Kūmara - Tohutohu (PDF, 38 KB)
Equipment
- Oven mitt
- Large saucepan
- Sharp knife
- Mixing bowl
- Chopping board
- Baking sheet, or dish
- Wooden spoon
- Vegetable peeler
- Sieve
- Oven
Ingredients
- 4 large kūmara
- 25 g butter
- 150 ml milk
- 350 g self-raising flour
- 1 teaspoon baking powder
- Oil or butter for greasing the baking tray
- Salt and pepper
What you do
- Preheat the oven to 200˚C.
- Peel and chop two kūmara.
- Put the kūmara and 1 tsp of salt into the saucepan and cover with water. Bring to the boil and simmer for 15–20 minutes or until the kūmara is soft.
- Drain the kūmara and mash with the butter.
- Grate two kūmara and mix with the milk, then add to the mashed kūmara and mix.
- Season with salt and pepper to taste.
- Sift the flour and baking powder into the kūmara, and mix to make a dough. Add more flour if it is too sticky, or more milk if it’s too dry.
- Tip the dough onto a floured surface and knead.
- Split the dough and form into two loaves.
- Put them onto a greased tray and bake for 25–30 minutes, or until it has risen and is golden brown.
Possible Assessment Opportunities
Students can:
- Research, design and carve an atua kiato from pumice to represent either Pani or Rongo, gods of the kūmara.
- Collaborate to write, resource, act in and stage a 3-act play based on the story of Tūmatauenga and Rongomaraeroa.
- Learn and recite the karakia on appropriate occasions – Maie te Tupua.
- In groups compose karakia acknowledging the gods Rongo and Pani and the kūmara.
- Students worked cooperatively giving and following instructions to cook a delicious kūmara bread.
