Summer Weather
Te Puna
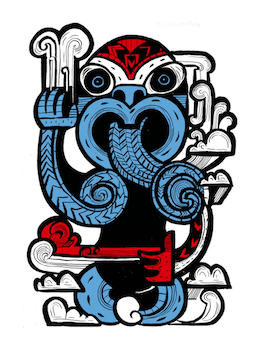
Atua Tāwhirimātea.

Whakapapa
The whakapapa of Tāwhirimātea.
Tāwhirimātea - Whānau Puhi - Whakapapa (PDF, 32 KB)
Pūrākau
Tāwhirimātea
Tāwhirimātea
https://www.youtube.com/watch?v=4xH5XbXSkeA
Waiata and Karakia
Whakataka te Hau
Maisy Rika performing the karakia:
https://www.youtube.com/watch?v=VAZwIAJBPwg
Another version:
http://folksong.org.nz/whakataka_te_hau/
Performed as a waiata:
https://www.youtube.com/watch?v=feiP2WxHGKY
Karakia
"Whakataka te hau ki te uru,
Whakataka te hau ki te tonga.
Kia mākinakina ki uta,
Kia mātaratara ki tai.
E hī ake ana te atakura
He tio, he huka, he hauhunga.
Haumi e! Hui e! Tāiki e!"
Whakataukī
Tūtū maiea Tāwhirimātea, whakatere ana Poupaka.
He Atua! He Kōrero!
Tāwhirimātea

This link is to a story about Tāwhirimātea and the separation of Ranginui and Papatūānuku.
- Students read the story independently and then in small groups write, resource and perform a play based on the story.
Add a challenge – students are to set the story in the future or the present, rather than the distant past.
- Use the He Manu Tuhituhi book He Tuhinga Whakangahau (pages 34–44, Te Whakaari Whakangahau) and the supporting He Kura Tuhituhi me He Manu Taketake (pages 159–183) to facilitate writing.
He Tuhinga Whakangahau
He Tuhinga Whakangahau (PDF, 27 MB)
And He Kura Tuhituhi me He Manu Taketake
He Kura Tuhituhi me He Manu Taketake (PDF, 5 MB)
Tāwhirimātea and his Brothers
- This is a link is to a short animation of the story of Tāwhirimātea and his ongoing war with his brothers Tāne, Tangaroa, Tū, and Rongo.
https://www.youtube.com/watch?v=4xH5XbXSkeA
- Students watch the video and in pairs record the dialogue as a script.
- Have students spend time with the script, researching unfamiliar vocabulary. The collective ‘new vocabulary’ becomes a word list for the class to learn.
- Pairs are to provide the following for each new word:
- Definition of the word
- Synonym
- Antonym
- A sentence using the word.
- Students watch the story again, without the sound. Get them to make a storyboard of the video, recording:
– Changes of scene.
– Appearance of characters.
– Action.
Remind students to include the time code for each scene change, or anything that they think is important.
- Using the storyboard and timeline, students write their own voice over for the video. They could include speech or dialogue, narration and possibly sound effects.
- Students pairs record their own voice over or soundtrack and play it alongside the video (sound off!).
Te Whānau Puhi – Rap Battle
Māori had extensive lists of names for winds. This is one, but there are many more. Your students could research and find out more about some of them.
| Tāwhirimātea | Titi-hau-mapu |
| Tāwhirirangi | Titi-kokouri |
| Rakamaomao | Titi-kokotea |
| Tahu-makaka-nui | Titi-kokohura |
| Tahu-mawake-nui | Titi-kokopara |
| Paraweranu | Titi-pokairangi |
| Hurunuku | Titi-te-apu-whakataka |
| Ahumairangi | Titi-tu-te-ahunuku |
| Titi-matangi-nui | Titi-tu-te-wanawana |
| Titi-mataura | Titi-tu-te-ihiihi |
| Titi-parauri | Titi-tu-te-winiwini |
| Titi-matakaka | Titi-tu-te-ahurangi |
| Titi-puhikura | Titi-tu-te-apurangi |
| Titi-kaurunui | Titi-atoa |
| Titi-roro-hau | Titi-atamai |
| Titi-apunui | Titi-mawake |
| Titi-apuhau | Titi-koroingo |
| Titi-koroirangi | Titi-rauroha |
| Titi-rauwha | Titi-takaipuni |
- As a class watch some rap battles – YouTube is a good place to start. ‘Epic Rap Battles of History’ feature historical characters (real and fictional) who battle in character.
- Split the list of winds and your class in half. Each group works with their list of winds to compose a rap. The two groups will then stage a ‘rap battle’.
- In their groups, students compose raps. Get students to consider the following:
– How many verses they should compose? Both groups compose the same number.
– Each group must include all the winds they have been given.
– Include at least one other atua associated with wind. Research that atua and its characteristics e.g. Tāwhirimātea – angry, dissatisfied, calm, stormy.
– Use the whakaranu puoro interactive to create beats:
- http://hana.co.nz/online/teaohurihuri/
- Launch interactive.
- Click on the ‘taonga’ icon.
- Click on the music note icon.
- Use the whakaranu puoro interactive to create beats and sounds for your rap.
- Groups stage a rap battle, taking turns to perform their raps, or parts of their raps.
- Film the rap battle and critique it as a class.
Whakataka te Hau
Whakataka te Hau is a classic karakia. Its wide usage has meant that it is often sung, as well as recited.
Ako ā-Kākā
Learn the karakia, Whakataka te Hau as both a karakia and a waiata.
Te Whānau Puhi
- As a class brainstorm ‘wind’ and find out what students know already. Using Post-it notes students write facts (1 fact per post it note) and post them on a class ‘cloud’ of wind knowledge.
-
Share the following information about ‘Ngā Hau e Whā’ with your students.
http://www.teara.govt.nz/mi/tawhirimatea/page-5 - Explain:
This activity is a wind challenge. You are to design and build your own wind-powered vehicle which you will use to race against one another.
Puff-mobile
As the teachers you could watch this link before you start the exercise.
http://www.pbslearningmedia.org/resource/phy03.sci.phys.mfe.zpuffm/designing-a-puff-mobile/
What you need
– 5 straws
– 5 lifesaver lollies
– 1 piece of paper
– 5 paper clips
– Tape
– Scissors
What you do
- Students work in pairs. They are to design an air powered vehicle that can travel 10 metres in the least number of ‘puffs’ (of air).
- They can use all or any of the materials they have been given – but nothing else.
- Mark out a 10 metre length that will be the race track.
- Set a time limit of 20 minutes to construct and 10 minutes for trial runs and modifications.
- Students race their vehicles taking the least number of breaths possible to blow it across the finish line.
Tūtū maiea Tāwhirimātea, whakatere ana Poupaka
This whakataukī literally means, when Tāwhiri rises up, Poupaka sails. It refers to waiting for, and recognizing, the appropriate conditions for an enterprise to be successful. In a nutshell, for something to be successful you should wait until the time and conditions are right.
Jet Air Ski Boat
The second part of the following challenge asks students to race their boats in different conditions. Get them to report back on the pros and cons of each set of race conditions.
-
Watch this video showing a simple jet propulsion activity with a balloon, a straw and string.
http://www.parents.com/fun/activities/indoor/jet-zeppelin/?socsrc=pmmpin071812cJetPropoulsion
-
Replicate with your students. Ask them to explain what they think is happening. Possible answer:
When the you let go of the balloon, the air rushes out the back and forces the balloon in the opposite direction along the string. - Introduce the next activity. Students work in pairs to design and build a jet propelled boat.
- Set a time limit. Organise a trip to a pool to race your boats.
What you need
- Styrofoam meat trays
- Balloons
- String
- Tape
- Rubber bands
- Washers (from a hardware store)
What you do
- The challenge is to build a boat that can travel across the water using only air.
-
Students present their boats and explain how they work. Race them across a pool; create changes in the race conditions e.g. make ripples or waves across the race path; take the boats outside to race in the open.
Make modifications. Race again.
Possible Assessment Opportunities
Students can:
- Work cooperatively to compose a ‘rap’ based on the whakapapa of Te Whānau Puhi and perform in a rap battle.
- Work cooperatively to write and perform a play based on the story of Tāwhirimātea and his brothers
- As a group, design, make and use costumes, props, and sets for the Tāwhirimātea play.
- Transcribe the Tāwhirimātea video, create a storyboard, and use these as a guide for writing a new script for the video.
- Record the new script as a voice-over.
- Design, build and test wind-driven vehicles for land and on water.
Te Whānau Puhi
The Water Cycle

What you need
- Copies of Kā Puna Hauaitu (item number 11173)
- A3 Cartridge paper (1 per student)
- A range of art materials to create posters showing the water cycle e.g. pastels, crayons, dye, water colours, paints
- A map of the South Island
What you do
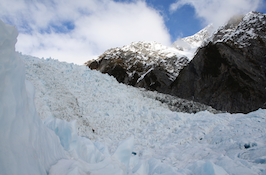
- Read pages 1–7 of Kā Puna Hauaitu which describes how the winds from the Tasman Sea (Westerlies) contribute to the formation of the glaciers in the South Island of New Zealand.
- On a map of New Zealand or the South Island, show where the glaciers are in relation to the Tasman Sea and westerly winds.
- Read page 5 of Kā Puna Hauaitu. Students then create a poster (using the materials you’ve selected) which demonstrates (pictorially or diagrammatically) how the water cycle works in the creation of the South Island glaciers.
- Posters should demonstrate the following stages of the water cycle:
- Westerly winds sweep across the sea.
- Water evaporates into the sky.
- Moisture forms into water droplets.
- Winds and the steep rise of the mountains cause clouds to rise up over the mountains – cooling and condensing.
- Rain begins to freeze and falls as snow.
- Pressure from the compacted snow forms ice.
- Ice is forced to flow downhill forming rivers of ice – glaciers.
- Ice under the surface of the moving glacier begins to melt and flows back into the rivers and eventually back out to sea ready to start the water cycle again.
- Display the posters in the classroom.
Note
If you can’t source copies of the book, download and print copies of the text only.
Kā Puna Hauaitu Wh1-7 (PDF, 56 KB)
Make a Hovercraft
http://deceptivelyeducational.blogspot.co.nz/2014/05/how-to-make-hovercraft.html
-
Introduce the idea of hovercrafts with your students. Find out what they know already. Show some videos and pictures of hovercrafts in action.

What you need
- An old CD
- Glue gun and glue sticks
- Thumbtack
- Soda bottle screw top (you want one that's fairly deep)
- A balloon
What you do
- Poke several holes in the plastic bottle top with the thumbtack.
- Use a hot glue gun to apply glue to the edge of the bottle top and glue it to the centre of the CD (over the hole).
- Blow up the balloon. Twist the neck of the balloon to keep it inflated and pull the lip of the balloon over the edges of the bottle cap.
- Ask students to make predictions. Will it glide through the air, move across the floor, rocket upwards?
- Set onto a smooth floor surface – carpet won’t work.
- Release the balloon and watch what happens.
- Students work in small groups and write a short statement about what they think happened and why. Groups present their ideas to the whole class.
Possible Assessment Opportunities
Students can:
- Clearly show their understanding of the water cycle in posters using a minimum of 6 stages in a flow chart of the different stages of the water cycle in the creation of glaciers.
- Explain their water cycle using appropriate terminology.
- Follow written instructions to build and operate a simple hovercraft.
- Students can provide an explanation about why and how the hovercraft works and discuss in a forum.
