Summer Weather
Te Puna
Atua: Tamanuiterā.
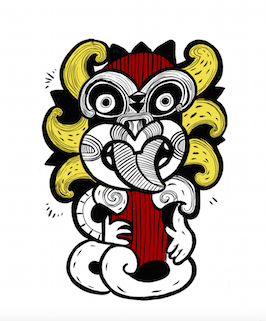
Whakapapa
The whakapapa of Tamanuiterā.
Tamanuiterā Whakapapa (PDF, 38 KB)
Pūrākau
Te Tōnga a Māui i te Rā
Ko Māui me te Rā
Waiata
Whakarongo mai …
The words …
https://waiatamai.wordpress.com/2015/01/08/te-waonui-a-tane-ki-kapiti/
http://paraparaumucollege.school.nz/school-waiata/
and the music …
https://www.youtube.com/watch?v=QGokkgYJXpI
Karakia
Te atua kōhikohiko ana mai
Te tupua i te taha o te rangi i au e
E rere mai, e te rā i te rangi rekoreko
Kau ana mai i te taupae
Ki te rangi e tū iho nei![1]
Whakataukī
Tērā te rā e whiti ana ki tua atu Tāwauwau.
He Atua! He Kōrero!
Te Whakapapa o Tamanuiterā
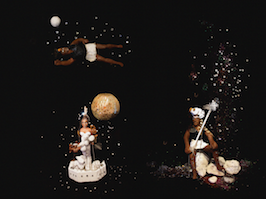
Ako ā-kākā
Learn to recite the whakapapa for Te Whānau Marama.
Ka moe a Ranginui i a Papatūānuku.
Ka puta ko Urutengangana.
Ka moe a Urutengangana i a Hineteāhuru.
Ka puta ko Tamanuiterā rāua ko Hineteiwaiwa
Ka moe a Urutengangana i a Hinetūrama
Ka puta ko ngā tini whetū.
Arā, ko Te Whānau Mārama!
Describing People
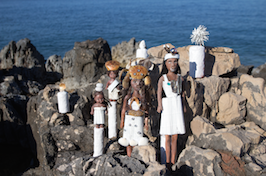
Here are the gods named in the Whānau Mārama whakapapa.
- Ranginui
- Papatūānuku
- Urutengangana
- Hineteāhuru
- Hinetūrama
- Tamanuiterā
- Hineteiwaiwa
What you need
- Copies of the Whakaahua ā-Kupu i te Tangata PDF
Te Whakaahua ā-Kupu i te Tangata (PDF, 38 KB)
What you do
- What do we know, think or feel about these gods?
If we met one of them today what would s/he be like?
- Students work in pairs. Each pair makes a chart answering key questions about their chosen atua. (Use the chart – Whakaahua ā-Kupu i te Tangata PDF.)
- The focus of this activity is descriptive language. The resulting charts become atua profiles – useful for other language activities e.g. the ‘Who am I?’ game.
Who Am I?
- Choose a student to be the player and tape a card with an atua name on his/her back. The other students can see the name but not the player.
- The player must guess which atua s/he is by asking questions of the class.
- The player can ask as many questions as s/he likes but the class can only answer with a yes or no answer.
- The player who guesses with the least questions asked, wins.
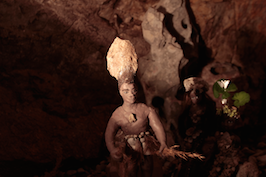
Stories about Tamanuiterā
-
Watch either or both:
Te Tōnga a Māui i te Rā https://youtu.be/jbM3PwcGi0g
Ko Māui me te Rā https://youtu.be/wgLWdCrgR7w - Students work in pairs. They choose one of the stories, and retell the story in their own words. They could mute the sound on the existing video and record their own narratives or perform it live to the class.
- Compose an acrostic poem for Tamanuiterā. For example:
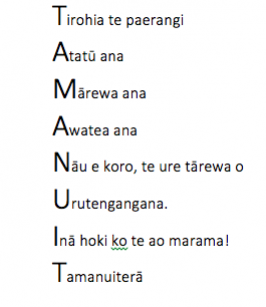
Whakarongo Mai

Ako ā-Kākā
Learn and perform the waiata Whakarongo Mai.
Te Atua Kōhikohiko
Ako ā-Kākā
Rote learn the karakia and use it to start the day.
Pōro Kupu Taka
This is an activity for learning new vocabulary. Use this list from the karakia:
-
- Atua
- Kōhikohiko
- Tupua
- Rangi
- Rekoreko
- Rā
- Taupae
- Taha
- Rere
- Kau
- Tū
- Write the vocabulary list onto the ball with a permanent marker.
- Students form a large circle around the room while you stand in the middle.
- GENTLY toss the beach ball to a student.
- Whatever word their left thumb lands on, they must define, use it in a sentence, or give an example of, e.g. Rā – he ingoa poto mō Tamanuiterā; Kei te whiti mai te rā.
- Then they GENTLY toss the ball back to you and you throw it to another student.
Note
This game can be used with multiple concepts e.g. vocabulary, synonyms/antonyms, prefixes/suffixes, compound words, contractions, parts of speech, sight words etc.
Tērā te rā e whiti ana ki tua atu Tāwauwau
This whakataukī is about remaining positive, particularly when dealing with difficult or challenging situations. A more contemporary saying is “Keep your head up.”
Practising Positivity – Gratitude Journal
Positivity is a frame of mind that really only comes naturally with practise. A gratitude journal exercises the ‘muscle’ that helps children to think, speak and behave positively.
- Give each student a scrapbook to take home and write and/or draw in at the end of every day. It could be for a week, over the school holidays, or for a whole school term.
Explain:
At the end of each day record one sentence describing something that happened during day that made you feel grateful. Illustrate your words with a picture or a photo.
-
Gratitude Journal Time
Make time for students to share their daily entries with the class e.g. the following morning. This activity supports children, teachers and parents to see what each other values. (Teacher should do one too!)
Possible Assessment Opportunities
Students can:
- Accurately recite Tamanuiterā’s whakapapa.
- Recognise characteristics of different atua through:
- A matching activity.
- Composing an acrostic poem.
- Retell the story of Māui and the Sun – video the presentations.
- Recite karakia accurately.
- Compile a Gratitude Journal over a set period.
- Participate in a Spelling Bee for new word list (derived from waiata, karakia and pūrākau).
- Perform the waiata, Whakarongo mai.
Tamanuiterā
Sun Printing
This is a great activity for learning about the power of the sun – it's fun and easy.
What you need
- A flat piece of cardboard covered in plastic e.g. Gladwrap
- Fabric – light cotton in white or light colours works best
- Water in a spray bottle
- Textile paints
- Big paintbrush
- Tape
What you do
- Tape material to your plastic covered board.
- Gather some fresh or dried leaves, branches, flowers, shells etc. Lay them out onto your material.
- Spray the fabric with clear water, then paint the fabrics with textile paint, keeping the whole thing very wet.
- Place plants or objects on the painted material right away – don't wait!
- Leave the fabric in direct sun for at least two hours.
- Remove the plants and see what has happened.
Sun-catchers
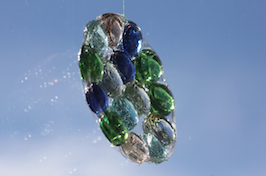
This sun-catcher project is simple and great for a warm, sunny day.
This sun-catcher is for inside use only, as the glue used is water soluble.
What you need
- Assorted colored glass beads or cabochons
- Elmer’s clear school glue
- Assorted plastic lids (save plastic container lids for this project)
- Fishing line
- Scissors
What you do
- Pour some clear glue into the lid in a thick layer.
- Place the glass beads into the glue, filling the lid with color in any design or pattern you like.
- Finish by adding more glue on top of the beads.
- Set them aside to dry – it will take about 2–3 days.
- When dried, peel them out of the plastic lids
- Use scissors to make a hole through the glue in the top of the sun-catcher.
- Thread fishing line through the hole and hang in a window.
Sunflowers
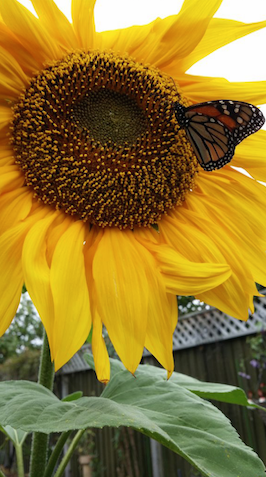
Planting sunflowers is a great first gardening project for children. They are one of the easiest flowers to plant from seed directly into the earth. They quickly grow into large magical plants that children love to admire and enjoy.
- To begin, share a book about how seeds grow.
How to grow corn is explained in Te Whakatipu Kānga, pages 12–22 (item number 710880 or download the App or PDF at:
http://hana.co.nz/online/te-whakatipu-kanga/
- Display a model or diagram showing the sequence of a seed’s growth.
Growing Seedlings
What you need
- Mammoth sunflower seeds
- Clear plastic cups
- Seed raising mix
- Spray bottle
- Scoop to transfer soil to cup
- Scoop seed-raising mix into plastic cup.
- Poke 2 holes in the soil and place a seed in each hole.
- Gently cover the seeds with soil and spray with water.
- Put craft sticks with the student’s name into the cup
- Put all the cups onto a tray, cover with plastic wrap and leave under a sunny window.
- Keep the soil moist and warm – check daily.
- In one week they are ready to be planted out.
What you do
Note
Sunflowers should be planted outdoors early in the spring. Start them about a week or two after your last expected frost.
Planting as Seeds
Plant seeds directly into the ground. Google “sunflower houses”, there are some great ideas for creating outdoor ‘rooms’ or ‘houses’ with sunflowers.
- Dig over the area where you are going to plant the seeds. Mix in some compost and water the ground first.
- Poke holes into the dirt and plant your seeds.
- Make sure you water them regularly.
- Planting sunflowers in a circle makes this activity even more fun. Make sure you stake the sunflowers as they grow. The sunflowers will get huge!
- Students could make observation charts as the sunflowers grow.
Making Sunflower Seed Butter
What you need
- 2 cups raw sunflower seeds
- Preheat oven to 180°C.
- Line a baking sheet with baking paper and spread with sunflower seeds.
- Bake for 5–10 minutes, until golden brown.
- Add roasted sunflower seeds to food processor or high-powered blender and blend until smooth.
- It takes a few minutes. Be patient.
- Yields about 1 cup of sunflower seed butter.
What to do
To Make Chocolate Sunflower Seed Butter
What you need:
- 2 cups roasted sunflower seeds
- 3 tablespoons cocoa
- 1–2 tablespoons honey
- 1 tsp of vanilla extract
And the same instructions!
Possible Assessment Opportunities
Students can:
- Follow instructions to make sun-catchers and write up the process, including any problems and solutions.
- Monitor the growth of sunflowers and present visual and oral reports.
Give and follow instructions on how to make sunflower butter.
[1] Astronomical Knowledge of the Māori; Elsdon Best; Dominion Museum, Wellingotn.
http://nzetc.victoria.ac.nz/tm/scholarly/tei-BesAstro-t1-body-d1-d4.html
