Kapa Haka
Te Puna
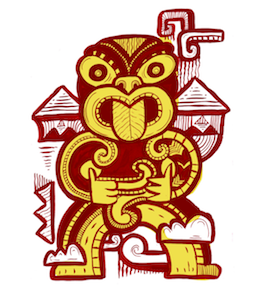
Atua: Tānerore.
Whakapapa
Tānerore - Whakapapa (PDF, 39 KB)
Pūrākau
Hine Takurua rāua ko Hine Raumati
Retold by Hana Pōmare, translated by Hēni Jacob.
Published in the journal Hine Raumati 1, pages 4–7, (2015, item number 711252).
The sun god Tamanuiterā and one of his wives, Hine Raumati, had a son named Tānerore. The quivering appearance of the air on hot summer days is a sign of Tānerore dancing for his mother, and this light, rapid movement is the foundation of haka.
Waiata
Te Whānau a Tamanuiterā
Lyrics by Hana Pōmare, music by Iain Gordon and Aaron Tokona.
Order a copy of the resource Te Ao Hurihuri, (2001, item number 10343) Included in the kit is a CD of waiata based on Māori cosmology – Te Whānau a Tamanuiterā is track 7.
Te Whānau a Tamanuiterā (SoundCloud)
Te Whānau a Tamanuiterā: Wai Ora – https://www.youtube.com/watch?v=Dgkom690Mpw
Karakia
Te Haka a Tānerore
Composed by Nuki Tākao.
"Nā Urutengangana
Ko Tamanuiterā
Nā Tamanuiterā
Ko Tānerore
E tū i te tū a Tānerore
E haka i te haka a Tānerore
Kia ihi
Kia wehi
Kia wana e!"
Whakataukī
I te rā e hana nei, ka herena e au ki te tenga o tōku korokoro.
He Atua! He Kōrero!
Hine Takurua rāua ko Hine Raumati
Hine Takurua rāua ko Hine Raumati (PDF, 23 MB)
What you need
- Copies of the journal Hine Raumati 1 (2015, item number 711252)
- Share these words and kīwaha with the class and provide meanings for any unfamiliar words. (See Kupu Taka in the back of the journal, Hine Raumati 1.)
What to do
- Share these words and kīwaha with the class and provide meanings for any unfamiliar words. (See Kupu Taka in the back of the journal, Hine Raumati 1.)
– Uriuri
– Ākau
– Kōhine
– Whāwhai
– Au
– Hōtoke
– Ngaki
– Matomato
– Uta
– Tai
– Waihoki
– e rua, e rua
– ko te painga atu tēnā
– wehe ana i te rekareka
– me te aha
- Read the story of Hine Takurua rāua ko Hine Raumati to the class.
- Working in pairs students retell the pūrākau – seeing what they can recall from listening.
- Students each have a copy of the journal Hine Raumati 1. In pairs they take turns reading aloud, with appropriate phrasing and expression.
- Students create a whakapapa chart for the characters in the story.
Hine Takurua rāua ko Hine Raumati – a play
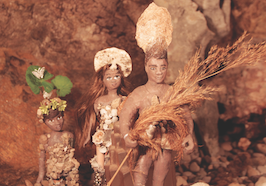
As a whole class, take the story of Hine Takurua rāua ko Hine Raumati and turn it into a play. Add the sequel – the story of Tānerore!
Characters:
– Narrator
– Tamanuiterā
– Tangaroa
– Hine Takurua
– Hine Raumati
– Tānerore
- Organise the class into groups of six. Explain that the plays are to be staged in one hour. They will need to work quickly and cover each of these parts:
– Writing – narration and dialogue
– Directing – movement, scenes and set
– Costumes (optional)
– Roles.
- You could set a timer for intervals to move groups through each of the areas they need to focus on e.g. 20 minutes for writing; 15 minutes each for costumes, props and set; 20 minutes for directing and staging; 5 minutes for final rehearsal.
- When the allocated time is up, invite each group to perform their mini-play.
Te Whānau a Tamanuiterā
Listen to either Wai’s song Te Whānau a Tamanuiterā or Ebb’s waiata of the same name.
Te Whānau a Tamanuiterā (SoundCloud)
- Students work in pairs, replaying the song and transcribing the words. Using a Māori dictionary like Tirohia! Kimihia! or the online He Pātaka Kupu, find the meanings of unfamiliar words.
- Report back to the class and share meanings to gain a better understanding of the song.
- In pairs students choose a verse of the song and make up hand actions, poi, tītī torea or tīrākau movements that tell the story of that verse in movement. Perform to the wider class.
Te Haka a Tānerore
Ako ā-Kākā
- Rote learn the karakia, Te Haka a Tānerore.
Impresssionist Painting
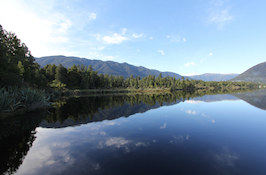
Introduce Impressionist art to your students. The Impressionists were interested in the effects of light, colour, and water.
Claude Monet was an Impressionist artist. Google “Impressionist art” or “Claude Monet” and show your students some of Monet’s work.
What you need
- Acrylic paints – a variety of hues of red/yellow and blue/green and white
- Rounded head paintbrushes
- A3 white art paper
- Pencil
- Ruler
- Rubber
- Paint palette or similar (plastic ice-cream container lids)
What you do
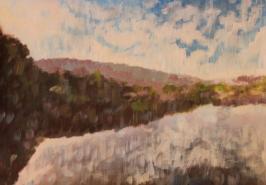
- As a class, look at some photographs and impressionist paintings of sunsets and sunrises over water.
- Explain that students will each produce an impressionist style painting – using the impressionist technique of “dab” painting (you could demonstrate this).
Explain that Claude Monet didn’t use black, but instead used purple, dark blues, or mixed contrasting colours to show shadow and dark spaces.
- Before they start painting students mix a range of tints and hues.
- Students lightly draw a horizon line on their paper using a ruler and a pencil. Then add a sun or light source. They could refer to photographs or paintings to help them.
- Students paint using the impressionist “dab” technique and colours to show light and shade.
Art Appreciation
Students present and respond to each other’s artwork.
Note
- You could organise a photography trip to take photo resource for students to paint from.
- Encourage students to layer colours and cover their whole page.
I te rā e hana nei, ka herena e au ki te tenga o tōku korokoro.
This whakataukī literally means, “While the sun glows I shall tie it to the lump in my throat.” It refers to the importance of remembering beautiful the good times – things that can lift your spirit in difficult times. It is a reminder to make the most of what you have and that positivity is a powerful thing.
Gratitude Blog
- Set up a class blog where students can post daily about something they’ve felt grateful for in the day and why.
- Alternatively, students can record a series of daily mini videos (15–20 seconds long) and after a week or a month edit the clips into a mini-documentary. They can add text, music and static images. This could culminate in a mini film festival on Gratitude.
Possible Assessment Opportunities
Students can:
- Work cooperatively to script and stage a play about Tānerore and his family.
- Read the story of Hine Takurua rāua ko Hine Raumati using appropriate phrasing and expression.
- Present (orally) their research on a waiata about Te Whānau a Tamanuiterā; and work cooperatively to choreograph actions and perform them to their peers.
- Create and impressionist painting, present their artwork to their peers and respond to the artwork of others.
- Contribute to a Gratitude Blog.
Kapa Haka
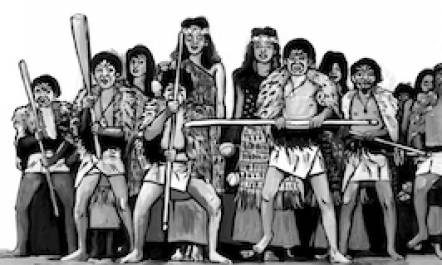
Project Runway
This project can be done in three parts – design, construct and show.
Part 1 – Kapa Haka Costumes
- Through a class discussion, look for an understanding of why kapa haka uniforms are an important element of kapa haka performance.
- Watch clips from Te Matatini, National Secondary Kapa Haka Competitions or Mana Kuratahi and look at the kapa haka uniforms.
- Make a collection of kapa haka costumes for display (male and female, and modern and traditional). Alternatively, source pictures of costumes.
- Show examples of uniforms – look closely at texture of fabrics or materials and the fit and construction.
- Organise a guest speaker to come and talk about the process of planning and making kapa haka uniforms.
- Ask students to share what they already know about kapa haka costuming and the importance of uniformity. Pose some questions for them to discuss in groups and report back to the class:
– What kapa haka uniforms were worn in the past?
– How were they made? What were they made from?
– What is worn now?
– How does it make you feel when you dress in uniform?
– Why are uniforms an important part of kapa haka?
– How did the rules and regulations for kapa haka uniforms come about?
– What are some of the rules in relation to uniformity in kapa haka?
– What are some of the rules that your own kapa haka group has?
– How do kapa haka uniforms give us a sense of belonging and ownership?
- Leave this lesson with students thinking about, and perhaps sketching, their kapa haka costume ideas.
- Examples or photographs of kapa haka uniforms for display
- Tapes: cellotape, duct tape, packing tape
- Stapler and staples
- Glue guns and glue sticks
- Pva glue
- Sequins, glitter, buttons, etc
- A selection of recyclable goods such as magazines, newspapers, plastic, plastic bags, material, old clothes etc
- A selection of natural resources found in the environment such as shells, feathers, flax, twigs, leaves
- Paints, brushes, needles, yarn
Part 2 – Kapa Haka Challenge
What you need
The Challenge
- Students are given the following scenario:
Your school kapa haka uniforms have gone missing and the concert is in two days. Students have to plan, design and make a new uniform in time for the concert. The materials they have to work with are recyclable goods and items found in the environment (e.g. paper, newspaper, plastics, shells, flax, feathers).
You need both a girls and a boy’s uniform. The girl’s uniform must have a bodice, piupiu/skirt/maro and a head piece. The boy’s uniform must have a piupiu /rāpaki /maro, hīeke and a head piece).
The uniforms must contain elements of traditional design, symbols and colour.
- The students are placed into groups of four and are given a range of materials to use in the planning and design of a contemporary kapa haka uniform. Groups take responsibility for either a girl’s or a boy’s uniform.
- Once students have drawn their plans and identified the different materials to be used, they can construct their uniforms. Set a time limit for the construction phase of the process – you may need an extra session.
Part 3 – The Show
- Students model the new kapa haka uniforms on a catwalk.
- Students can then evaluate their own uniform based on plan, design and construction:
– What worked well?
– What needs improving?
– What would you do differently next time?
– Did your construction look like your plan?
– What did you need to change from your plan/design in order for your costume to work?
- Collect the group designs and evaluations to use as a measure of initial understandings about the design process (incorporating elements of tradition) and the ability to adapt and refine designs.
Possible Assessment Opportunities
Students can:
- Identify materials used to make traditional kapa haka uniforms.
- Suggest how kapa haka uniforms were designed and made in the past.
- Identify fabrics used to make contemporary uniforms.
- Suggest how modern kapa haka uniforms are designed and made.
- Work cooperatively to plan and design a kapa haka uniform made out of recyclable goods and objects found in the environment.
- Use elements of traditional designs, symbols and colour in the uniform design and construction; and evaluate the planning, designing and construction process.
Group Assessment
- The kapa haka uniform designs include three completed items of clothing or decoration.
- Designs are original and well thought out.
- Designs contain elements of traditional symbolism and colour.
- A plan for construction, roles and responsibilities is organized.
- Students are able to evaluate their planning, designing and construction process.
