Summer Weather
Te Puna
Atua: Tamanuiterā.
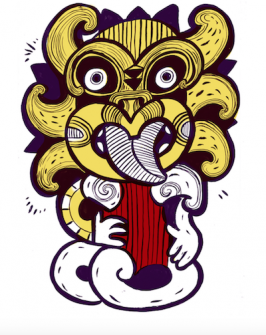
Whakapapa
The whakapapa of Tamanuiterā (PDF, 35 KB)
Pūrākau
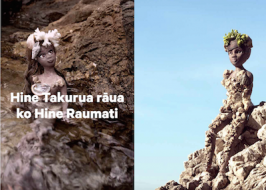
Hine Takurua rāua ko Hine Raumati
This story is in the journal Hine Raumati 1, pages 4–7, (2015, item No. 711252).
Waiata and Karakia
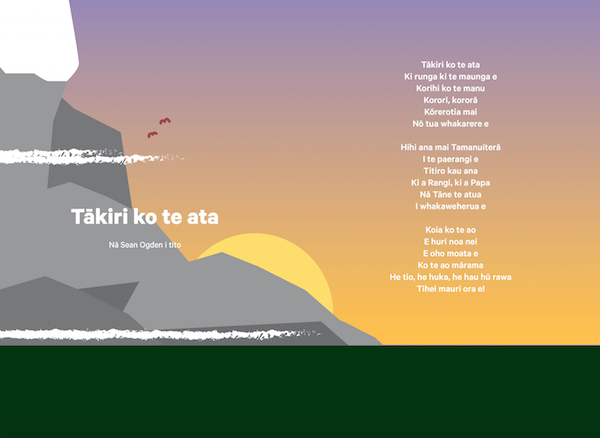
Tākiri ko te Ata
Composed by Sean Ogden.
This karakia can be found in the journal Hine Raumati 1, page 2–3 (2015, item number 711252).
It is also performed as a waiata by the group Tauira and is available on the iTunes Store.
Whakataukī
Ka tō he rā, ka rere he rā.
He Atua! He Kōrero!
Te Whakapapa o Tamanuiterā
Ako ā-Kākā
Rote learn a simple whakapapa of Tamanuiterā.
Ka moe a Ranginui i a Papatūānuku.
Ka puta ko Urutengangana.
Ka moe a Urutengangana i a Hineteāhuru.
Ka puta ko Tamanuiterā.
Make Mobiles
- Make mobiles from sticks and feathers to represent Tamanuiterā’s whakapapa. Use the mobile as a visual and tactile prompt for reciting whakapapa.
- Make a mobile and demonstrate using it to recite whakapapa. Talk about how our tūpuna used rākau whakapapa for the same purpose and show some pictures of these.
What you need
- 2 sticks, 20 cm and 15 cm in length per student – driftwood, branches, kōrari or bamboo
- Feathers 5–10 cm, 5 per student
- String, wool or fishing line
- Scissors
- Felt pen
What to do
- Cut 4 pieces of string to 10 cm long and tie each one to the quill of a feather.
- Cut another piece of string to 20 cm cm long and tie to the last feather.
- Lay out the sticks and feathers on a table.
- Mark the sticks with a felt pen where you will tie each feather and the other stick.
- Tie the feathers and sticks.
- Using the mobile as a prompt, students practise reciting Tamanuiterā’s whakapapa.
Hine Takurua rāua ko Hine Raumati
 What you need

- The story of Hine Takurua rāua ko Hine Raumati
- Small cards
- Pen
What you do
- Read the story of Hine Takurua rāua ko Hine Raumati to your students.
- Ask students to retell a part of the story that they can remember. As they retell their part draw a little picture onto a card to remind them, write their name on the back of the card and give the cards back to them.
- Tell the story again and ask the students to pay attention to when their piece of the story comes up. When it does they can put their hand up.
- As each hand goes up invite the student to come stand in a ‘story line’. By the end of the story they should all be standing in a sequenced ‘story line’.
- Tell the story once more so they can check their place in the ‘story line’.
- Have the ‘story line’ retell the story. They won’t have all the parts of the story but they’ll have enough.
- If more than one student has the same part of the story that’s fine. They can stand together on the ‘story line’. It also provides an opportunity to talk about the parts of the story.
Tākiri ko te Ata
Ako ā-Kākā
- Rote learn the karakia Tākiri ko te Ata and recite as a class every morning.
- Learn Tākiri ko te Ata as a waiata and sing in the mornings.
- Look at this repeated language structure from the karakia:
-
- tākiri ko te ata
- kōrihi ko te manu
- In pairs read aloud the following words and match the word on the left to the most appropriate word on the right. Refer back to the karakia if necessary.
| Tākiri | Ao |
| Kōrihi | Rā |
| Hihi | Manu |
| Huri | Ata |
- When the words are matched, say the phrases aloud, e.g. “Tākiri ko te ata.”
Ka tō he rā, ka rere he rā
- Watch ‘Māui me te Rā’.https://www.youtube.com/watch?v=wgLWdCrgR7w
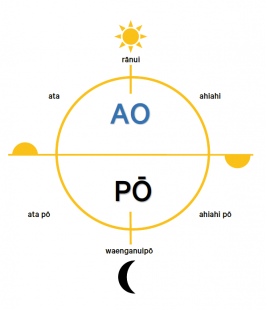
- Talk about day and night. What words do we use to talk about day and night? Here is a diagram and some key words: Ao, Pō, Ata, Rānui, Ahiahi, Ahiahi Pō, Waenganuipō, Ata Pō
A Day and Night Mural
- Talk about each time of the day and night and what sorts of things we do at these times.
- Students choose a time of day and each draw a picture and write about what they do at that time.
- In pairs, small groups or as a class, students present their pictures and explain what they do at their chosen time of day.
- Make a mural featuring a sun and moon and display the students work around them.
Possible Assessment Opportunities
Student can:
- Recite the whakapapa of Tamanuiterā using a mobile as a prompt.
- Retell the story of Hine Takurua rāua ko Hine Raumati as a whole class story line.
- Recite the karakia Tākiri ko te Ata.
- Perform Tākiri ko te Ata as a waiata (whole class).
- Use different terminology for parts of the day and night and describe activities that occur at these times.
Tamanuiterā
These activities demonstrate the sun’s energy. Before each activity, find out what your students already know about the sun’s energy and what it can do.
Sunscreen Science
- As a class have a ‘sun-smart’ discussion. Ask questions like:
-
- Why do we wear sunscreen?
- When do we need to wear sunscreen?
- What does sunscreen do?
This simple science experiment shows what sunscreen does – it blocks the sun’s rays from burning your skin.
What you need
- Sheet of black construction paper
- White crayon or chalk
- Spray on sunscreen
What you do
- Draw a line down the middle of the paper and label one side “sunscreen” and the other “no sunscreen”.
- Lightly spray sunscreen onto hands.
- Make a sunscreen handprint on the side of the paper labeled “sunscreen”.
- Leave the paper outside in full sun for 3–4 hours.
- The paper will become sun bleached, however the paper under the sunscreen handprints will remain the original color.
- Working in pairs and using these questions as prompts, have the students discuss their findings and report back to the class.
-
- What did you notice about both sides of the paper?
- What do you think happened?
- What does that tell you then about sunscreen, the skin and the sun?
Making Raisins
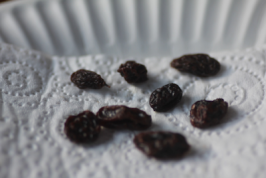
What you need
- Grapes
- Paper towel
- Plate
- Sunlight
- Pencil
- Copies of observation chart Te Tunu Raihana PDF
- Camera (optional)
What you do
- Put grapes onto a paper towel on top of a plate and leave on a sunny windowsill.
- Check grapes every day and keep an observation chart. Students could either draw what they see or take photographs.
- It will take about two weeks in the sun for the grapes to become raisins.
- Use the observation chart template – Te Tunu Raihana PDF.
Make a Sundial
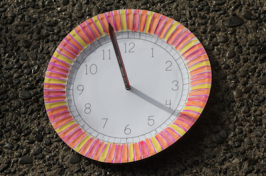
What you need
- Paper plate
- Paint and paintbrushes
- Pencil
- Printable clock-face template – http://pagingsupermom.com/wp-content/uploads/2015/05/sundial-clockface-printable.pdf
- Hammer and nails
- A compass
What you do
- Paint the back of the plate or leave it plain.
- Cut out the clock face and glue it on the back of the plate.
- Use a hammer and nail to punch a hole in the center.
- Stick a pencil through the hole and go outside.
- Use the compass and align the “12” to North to determine the current time.
- Use the sundial at periods during the day and mark the times on a chart. Then check with the classroom clock and write down that time.
What Melts in the Sun?
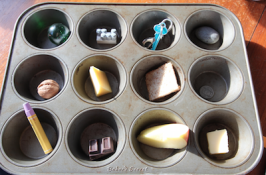
What you need
- A timer
- Muffin tins
- Assorted objects (things that will melt and things that won’t), for example:
-
- Coin
- Stone
- Chocolate
- Crayon
- Soap
- Marble
- Cheese
- Butter
- Lego
- Bread
- Piece of apple
- Keys
What you do
- Students work in pairs or small groups. Students fill a muffin tin with the assortment of objects – something different in each hole.
- Place the tray in the sun, set a timer for 10 minutes. Students check and observe any changes.
- Check for changes at 10 minute intervals for the next hour.
- Encourage students to look for other changes too e.g. bread drying out; stone getting warmer.
- Make a chart to record what happened. Students report their findings to the teacher or the class.
Possible Assessment Opportunities
Students can:
- Express what they observed happening in the sunscreen experiment in a discussion with peers.
- Keep an observation chart showing the changes over time in the ‘making raisins’ activity.
- Make a sundial and record with a camera the ‘times’ at set points in the day.
- Present their group findings as a chart or orally.
- Organise a ‘Sun Science Evening’ where students can share their findings with whānau, explaining what they did and what they found out.
